How do you QC a permanent magnet, magnetic assembly, or a piece of equipment utilizing magnets? There are several methods that will pass a Gage R & R, but they are generally unknown to people outside of the magnet industry. Much of the technical data about magnetic fields, both commonly published and taught at the university level, pertain to magnetic fields created by electromagnets or products utilizing energized coils. The units for electromagnets and coils are more akin to Electrical Engineering units and not to traditional permanent magnets. While both energized coils and permanent magnets do create a net external magnetic field, the nature of permanent magnets is very different.
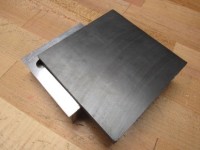
Ceramic magnet with a Fixture
The best method of inspecting a permanent magnet’s conformance to a specification is to judge its performance in the actual application. If the magnet needs to “trip” a sensor, it should be installed in the device it will operate in or in a mock-up in order to ensure it operates as expected. This also applies to magnets used for holding and fixturing, magnetic coupling, electromechanical devices, etc.
With this said, many applications do not lend themselves to simple bench-top mock-ups, or, in some instances, a simpler, less intensive QC investigation is desired. When mocking-up the application is not possible, the next best method is to measure the magnet’s magnetic field. While this sounds simple, the measurement of magnetic fields is fraught with pitfalls.
Magnet Tests & Methods
Some difficulties result from differences in commonly used unit systems, such as lack of working knowledge of magnetics, and lack of magnetic measurement equipment in most QC departments. Despite of these inhibitors, proper QC documentation and magnet tests & methods can be created by drawing on your vendor’s expertise to lead you through this process.

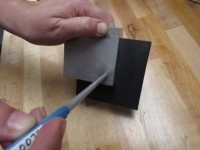
Hall Probe testing the center of the Ceramic magnet using the fixture. The probe is located in a hole in the fixture
Beyond evaluating a magnet’s compliance to a performance specification while installed in the actual device or operating condition, there are three main methods of measuring a magnet’s magnetic field in order to verify its usability.
The first method is to measure the magnet’s Field Strength at one or more points with a Gauss-meter utilizing a Hall Effect Probe. This measurement will be relative from a standpoint that the measurements will be compared to a known good magnet. This known good magnet is one that performs as required in the actual application. Oftentimes, operating thresholds are used to develop a tolerance for the magnetic strength measurements to further enhance this method. The difficulty with this method is that a magnet’s magnetic field varies greatly over a volume and is very dependent on the position of the probe. In order to ensure an accurate measurement, a jig or fixture must be employed so that each magnet is measured at the same location. Another issue is that the field strength reading is relative to the equipment used. Two different Gauss-meters using two different probes will result in different measurements. This can cause difficulties between vendors and customers discussing and comparing QC measurements on a batch magnets.

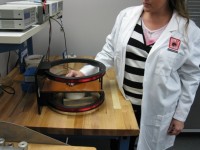
Magnetic Moment Inspection with a Helmholtz Coil Set and Flux-meter
The second method of measuring a magnet’s magnetic field in order to judge performance is to measure the magnet’s magnetic moment. This is a total magnetic field measurement employing a Flux-meter and a Helmholtz coil set. This measurement is not equipment dependent and different sets of coils and meters will return the same measurement of a common magnet. Another benefit of this type of measurement is that it will generally pass a Gage R & R investigation. The center ⅓ of the internal coil set volume is used and this greatly reduces or eliminates the positionality of the measurement and therefore the differences between operators. Similar to the Field Strength method, known good magnets are used to establish thresholds. Measurements are then compared to the thresholds to ascertain the sample’s conformance. The drawback to this measurement is that the equipment is a capital investment and availability of calibration vendors is quite limited. Another potential issue is that the magnetic moment measurement quantifies a somewhat nebulous property of a magnet that is not typically directly related to an actual application. This non-tangible measurement can cause operators to mistrust the inspection method. (The magnetic moment is essentially a Torque that is proportional to the magnetic field produced by the magnet.)

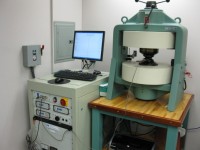
Hysteresisgraph in Dura Magnetics’ Lab
The last typical magnetic measurement option is to use a Hysteresisgraph and actually measure the (4) main magnetic characteristics of magnet alloy. This method leaves no uncertainty of the actual magnetic properties and therefore the conformance of a magnet sample to a particular grade. While this is the most thorough method for evaluating a magnet, it also has the most inhibitors. The equipment is very expensive, upwards of $ 75,000. The training and calibration is quite intense and samples must be cut in order to execute the evaluation. Oftentimes, the magnets that are desired to be tested do not lend themselves to the sample size and the resulting measurement has error introduced.
Evaluating a magnet’s compliance to a specification can be difficult, but not impossible. One should be able to depend on the magnet vendor for help in setting up a QC process. There are several methods with which one can use to evaluate a magnet, but they do have some integration challenges. If you need help evaluating the strength of a permanent magnet or magnet assembly, contact Dura Magnetics for further assistance in magnet qualification.
